.png)
When people hear “concrete X-ray,” they often still imagine a slow, complicated process that only works after hours. On a real job site, modern digital concrete X-ray is much more practical than that.
The actual digital concrete X-ray shot for one location is typically only 30 to 180 seconds.
The rest depends on site access, setup, alignment, review, and markout. That timing can vary depending on site access, slab conditions, congestion, and what exactly needs to be confirmed, but the main point is simple: this is not an all-day shutdown - the actual shot itself is typically only up to 3 minutes.
That is why digital concrete X-ray is often easiest to understand as GPR-speed X-ray. The workflow is fast enough for active construction, but instead of relying on indirect signal interpretation, the crew gets a true radiographic image of what is inside the slab.
To get a free quotation for your job, visit the Nova homepage
If your project only needs radar-based locating, you can also review our GPR concrete scanning service page
Digital concrete X-ray is used when the project team needs to see what is inside a slab before: coring, cutting, trenching, installing sleeves, confirming a hole location, verifying congestion before committing to the layout
On a real project, this is not just another scan. It is a controlled field workflow built around one goal: get a clear image of the embedded objects inside the slab and turn that image into a usable decision on site.
That matters most when the site cannot afford guessing. Typical examples include:
The practical value is straightforward. The crew gets the image, reviews it immediately, measures from it, and marks the slab in one continuous sequence. That is what makes the method useful - it is faster, cheaper, and much safer.

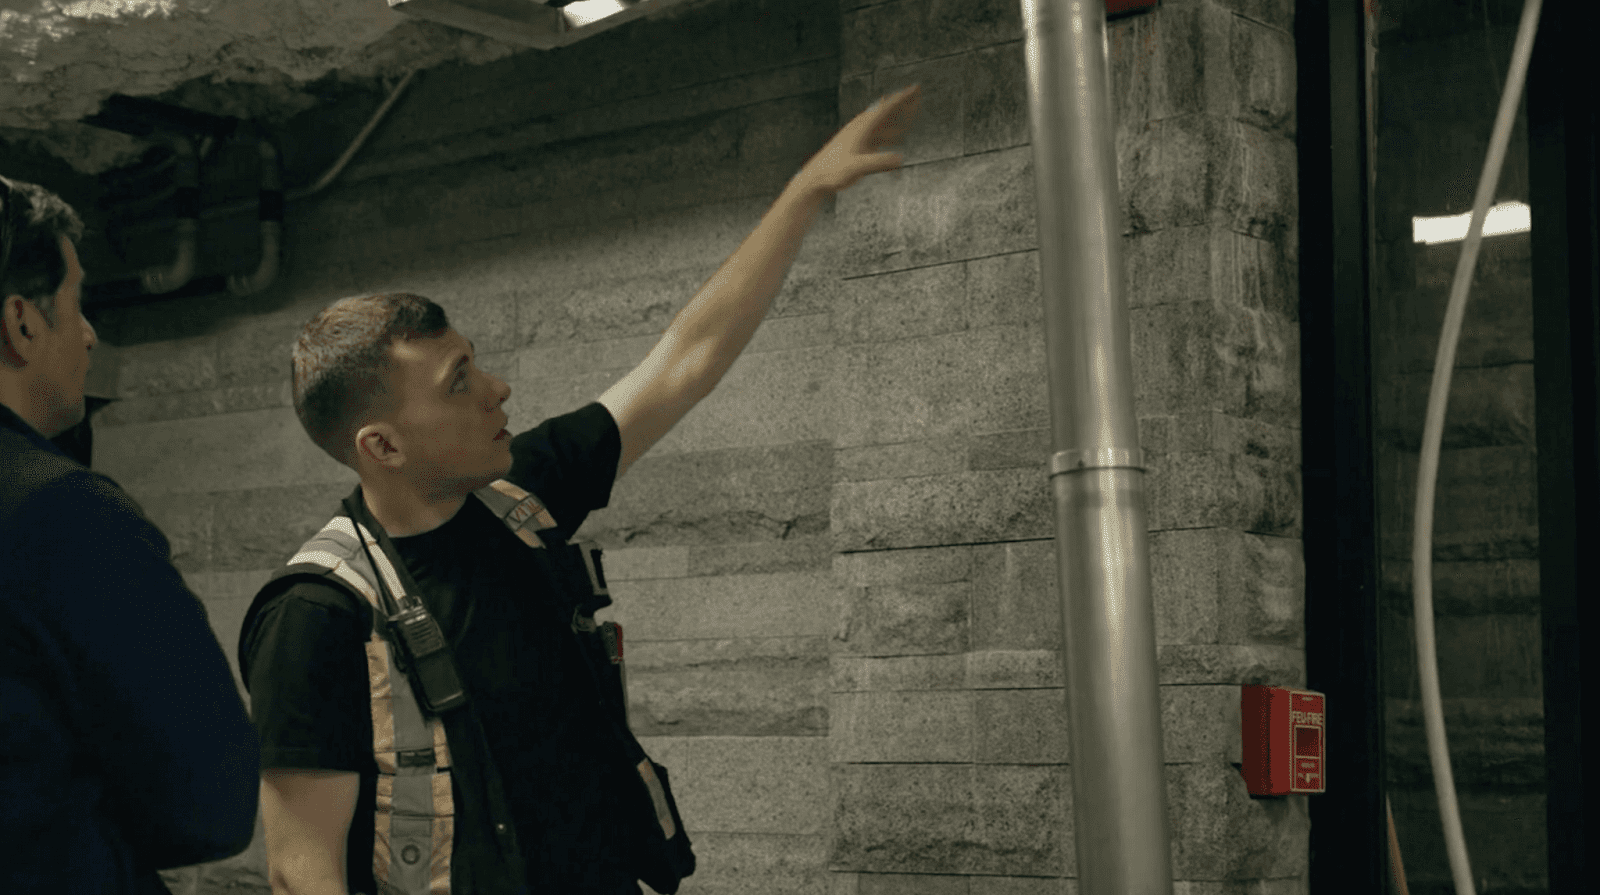
From the job site’s point of view, the setup is straightforward.
A standard digital concrete X-ray crew works with:
The setup works like this:
That digital workflow is what changes everything. There is:
Once the image is captured, the crew can review it immediately, confirm what is inside the slab, measure from it, and move directly into markout.
A digital concrete X-ray job usually moves through three main stages:
This is important because it shows the job is not one long X-ray event. Most of the visit is setup, alignment, image review, and markout. The actual exposure is only one short part of the overall process.
Preparation is where the crew defines the location before any shot is taken.
This usually includes:
This phase matters because it makes the next stage faster and cleaner. A good image starts with good preparation. If the team knows exactly what the client needs at that location, they can use the X-ray image for a real decision, not just a general scan.
Preparation also matters for radiation control. The better the setup and alignment are handled before the shot, the shorter and more manageable the active exposure window becomes.
Once the setup is ready, the crew moves into the shooting phase, cycle actions.

The sequence is straightforward:
The important practical point here is that the exposure itself is short. It depends from the slab thickness, from 30 sec for 8” and up to 180 seconds for 14”. That is what makes the workflow workable during normal jobsite operations, not necessary to shutdown the site or inspect after hours only.
For example in the Vancouver branch, most of the X-ray jobs we do during regular hours.
This is also where the imaging advantage becomes obvious. The crew is not trying to estimate what is inside the slab based on indirect signal behavior. They can look at the slab image and see the embedded elements directly to determine whether that hole will fit.
That helps answer the real field question quickly:
Post-processing begins right after the shot. It is not a delayed step.
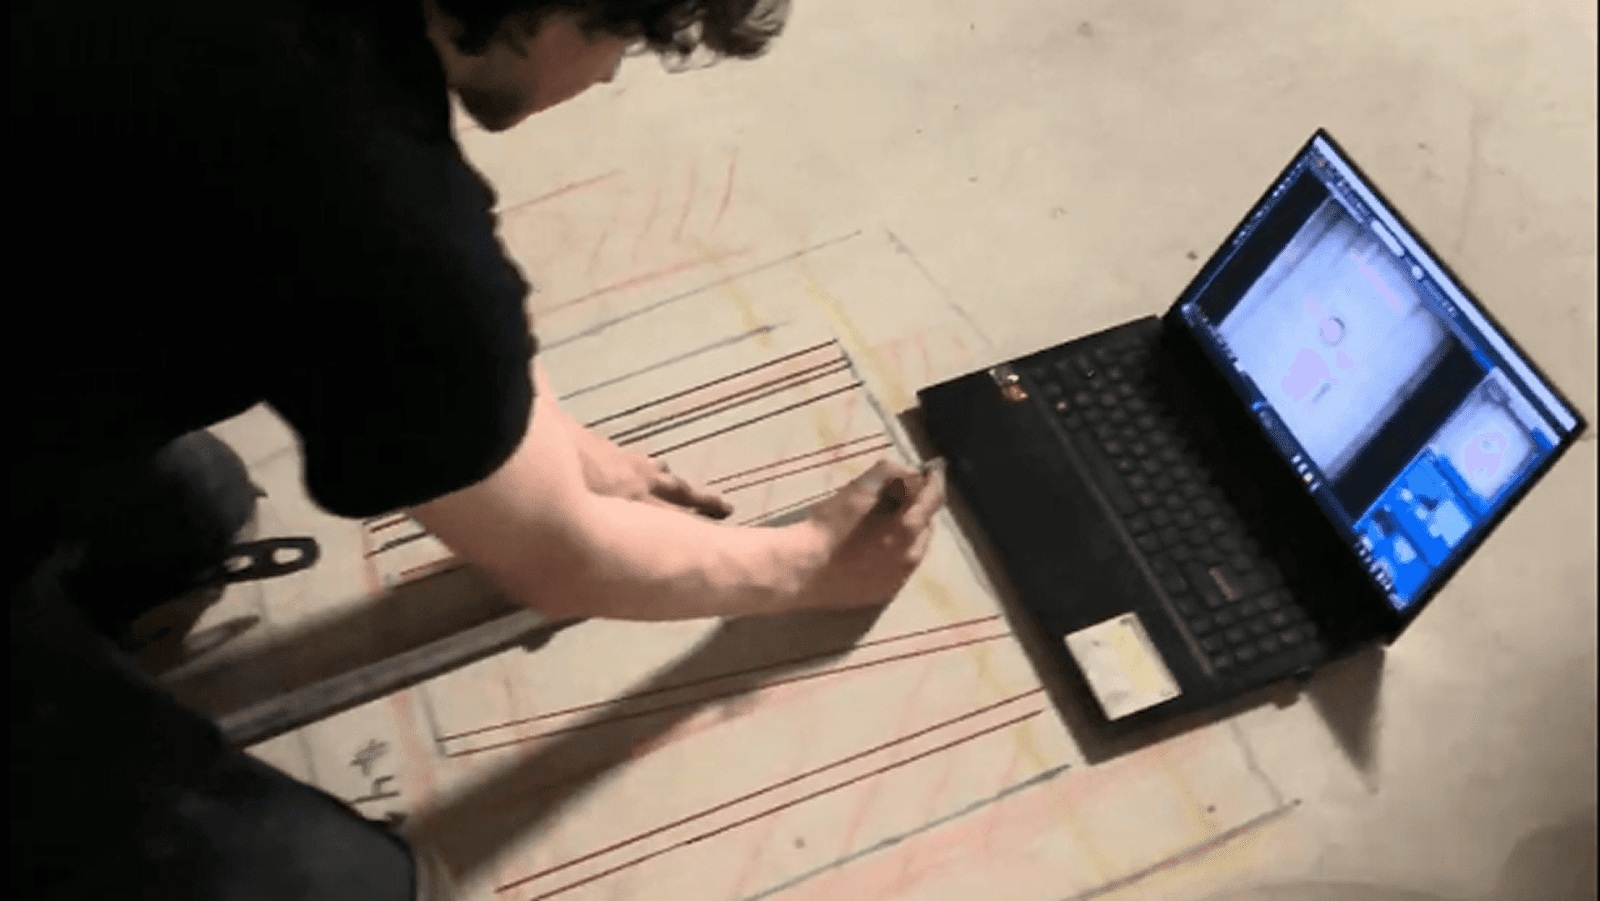
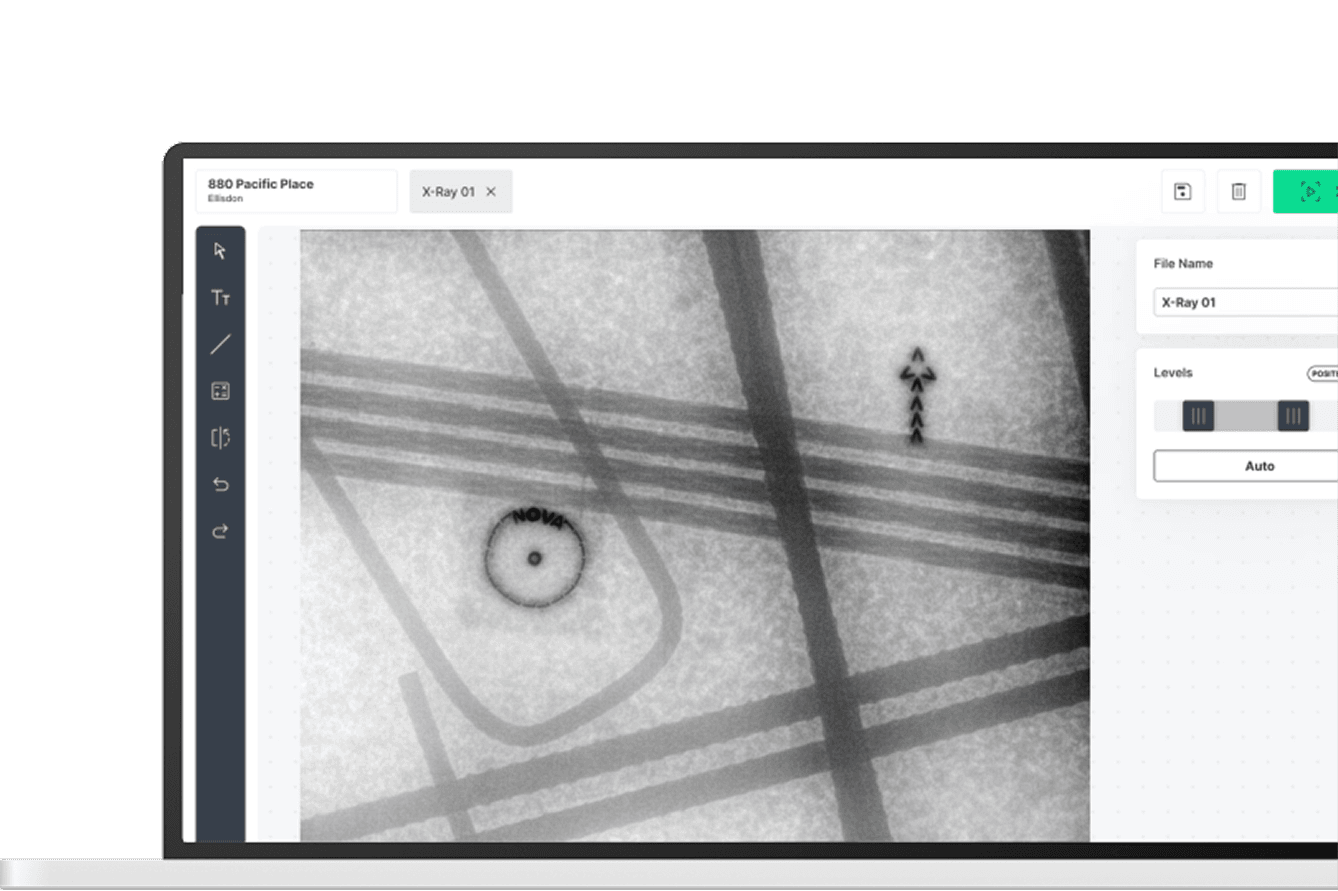
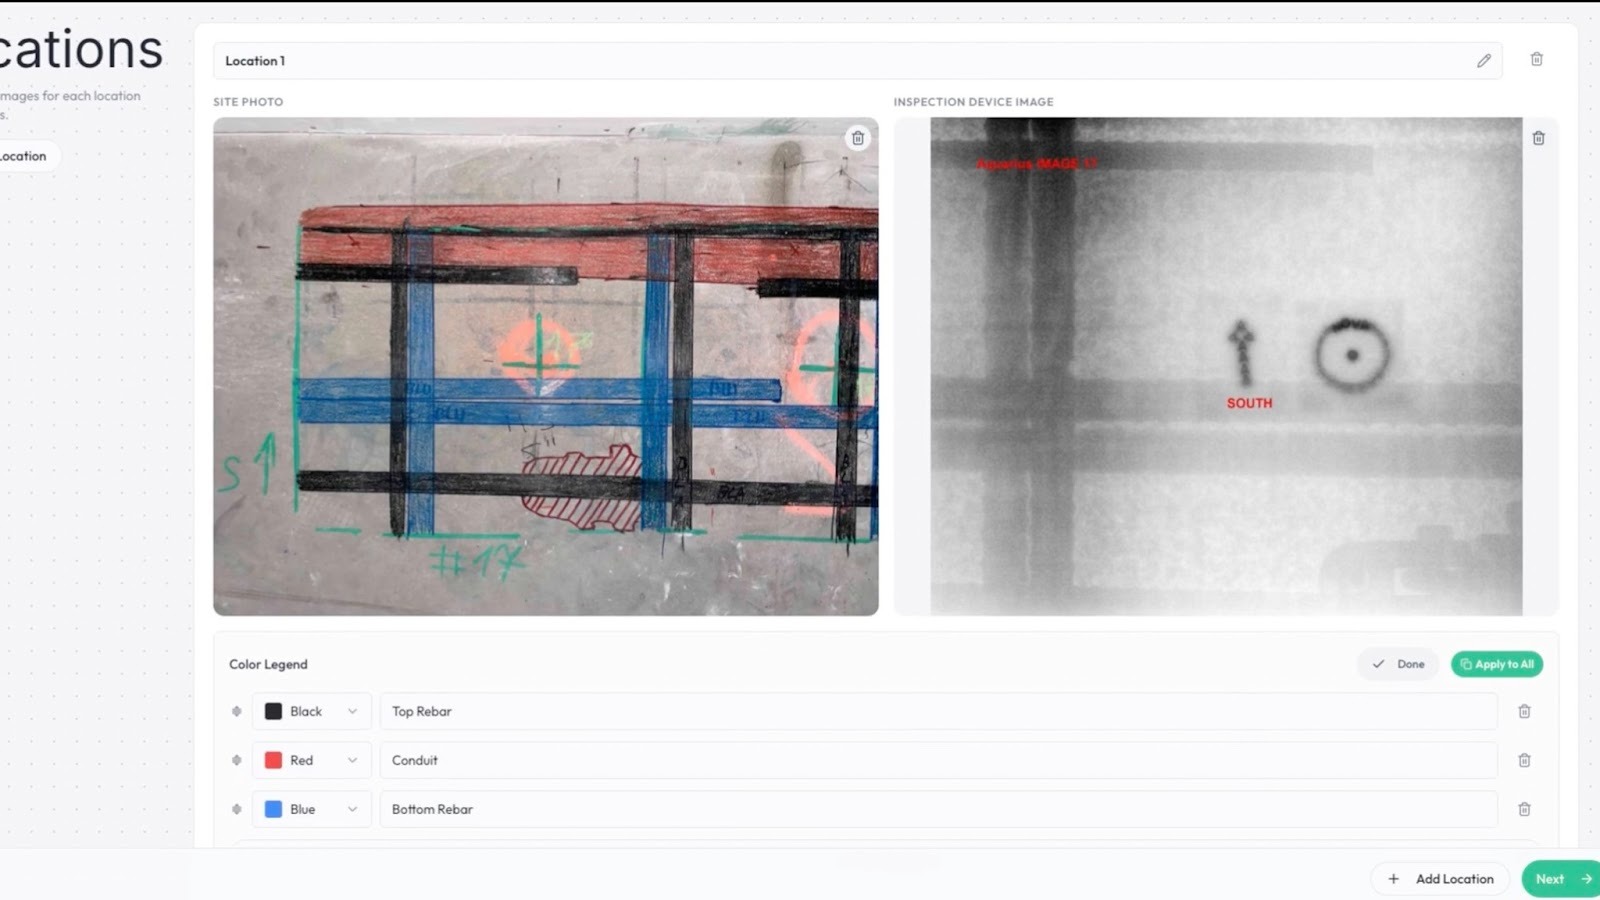
Once the image is on the laptop, the technician can:
This is where the Digital X-ray becomes useful to the client and field crew. The goal is not just to collect an image and give you peace of film. The goal is to turn that image into a usable markout on site and provide a report with site photo and X-Ray image as a proof.
That direct sequence — image, review, measure, mark — is one of the biggest operational advantages of digital concrete X-ray.
Before the work begins, there are a few basic conditions that need to be confirmed.
This is the main requirement for a standard digital concrete X-ray setup. The source is below and the panel is above, so access is needed on both sides. Yes, it can be considered like limitation but you need access to bottom side in any ways to catch the core when we core - so we consider it like advantage for client because we check if it’s even possible to core there due to underside conditions.
In practical terms, slab thickness is commonly workable up to about 14 inches, with some thicker slabs still possible depending on density, access, and geometry.
The crew needs the ability to control the required area during the shot. That does not mean shutting down the entire floor for the whole visit. It means short controlled access during each exposure window. We have to ask people to leave the 15 ft area on top side and 50 ft under side area for those 30-180 seconds.
Once those conditions are in place, the workflow itself is direct.
Digital concrete X-ray stands out for three practical reasons: it provides a real image, works fast enough for active construction, and can be managed safely on a live site.
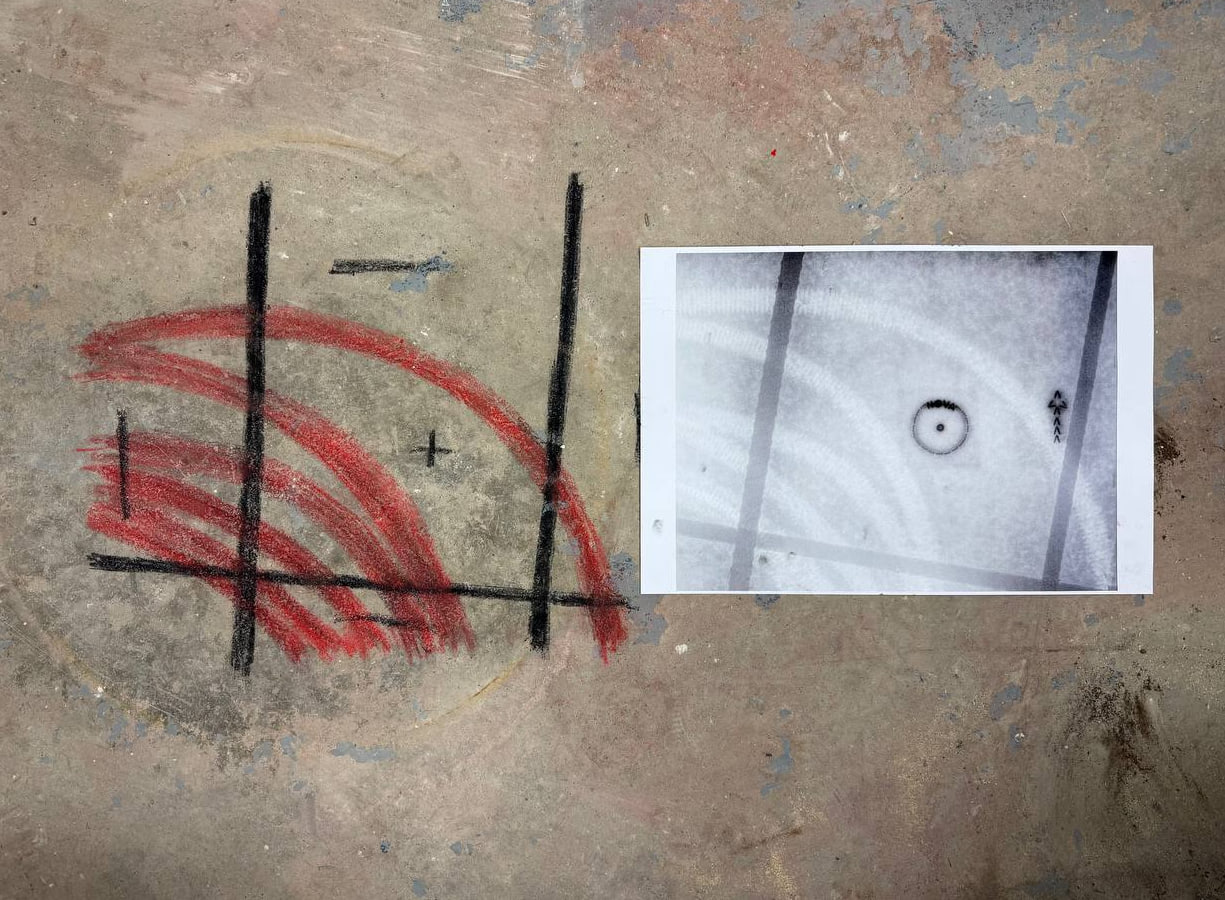
Unlike radar-based scanning, where the technician often interprets indirect signals, digital concrete X-ray shows a real radiographic image of what is inside the slab. Rebar, conduits, post-tension cables, and other embedded elements are visible directly. That matters because the real question on site is often not just whether something is there, but exactly where a 2-inch core can fit, how much space exists between PT cables, or whether the layout can stay where it was originally designed. In many cases, the value is not only finding embedded objects, but identifying a more advisable spot to core or cut.
The actual shot is typically only 30 to 180 seconds per location. The full cycle also includes setup, alignment, image review, measurement, and markout, but the exposure itself is short. That makes the process practical for active jobsites. It is not one long X-ray event, but a series of short, controlled shots that fit into normal field operations.
Modern digital concrete X-ray does not work the way many people still imagine traditional film-based X-ray. The area is controlled only for the shot itself: the crew aligns the equipment, closes the controlled area, energizes the source, takes the shot, turns the source off, and reopens the area right away. In practical terms, that means short standby periods rather than long shutdowns.
Together, these advantages make digital concrete X-ray especially useful when the team needs a more definitive answer than standard scanning can provide.
For project managers, superintendents, and trade contractors, the benefit is not only technical. It is operational.
A better image and faster workflow can help reduce:
On tighter jobs, that can make a real difference. If the team has a clear image of what is inside the slab, they have a better chance of keeping the intended hole location or making only a small adjustment instead of redesigning the path around uncertainty.
A good example of this in practice is our Oakridge project with EllisDon. You can read the case study here: How EllisDon prevented concrete strikes with Digital X-Ray at Oakridge Mall
Yes. Digital concrete X-ray is designed as a two-person field operation because the workflow requires coordination on both sides of the slab at the same time.
Yes. The source is positioned on one side of the slab and the detector panel on the other. Without underside access, the standard digital X-ray workflow cannot be performed.
No. The controlled area is active only during the shot, typically around 2 to 3 minutes per location, and it reopens immediately after. The workflow is built around short pauses, not prolonged shutdowns.
In practical field planning, approximately 50 ft radius on the bottom side and up to 15 ft on the top side is a common starting assumption. Exact distances depend on slab thickness, density, and site conditions and are verified on site.
The actual shooting time is typically around 30 to 180 seconds per location. Total time on site depends on access, alignment, slab conditions, and markout requirements.
Smaller, better-prepared jobs can move faster. Workflow discipline and site conditions play a major role.
Usually because of workflow issues rather than the imaging itself. Common causes include poor preparation, unclear relocation rules, blocked underside access, rushed alignment, or time lost coordinating the controlled area.
Companies bring in X-ray for clarity and confidence. The biggest mistakes are the ones that quietly reduce those two things in the field.
The image is important, but the markout is what the field crew actually uses. If the transfer from screen to slab is rushed, even a good image can lead to a poor field result.
If the source and panel are not aligned correctly, the image geometry shifts. Objects can appear offset from their true position, which makes accurate markout more difficult. That is why it is important to remove obstacles from the underside of the slab as much as possible.
When underside access is not confirmed, slab conditions are not verified, points are not located during warm-up, and scope rules are not clear, the shooting stage becomes slower and less productive. Preparation is what allows the rest of the workflow to feel controlled.
Digital concrete X-ray fits active construction better than many people expect because the workflow is immediate and controlled.
The practical advantages are straightforward:
For general contractors and trade contractors, that often means:
This does not mean there is no planning involved. The work still requires trained operators, proper access, and proper area control. But from a site operations standpoint, it is far more manageable than the old perception of X-ray suggests.
For project managers, superintendents, electricians, plumbers, mechanical contractors, and coring teams, that is the key point. Digital concrete X-ray is not just about seeing inside concrete. It is about getting that information quickly, clearly, and with manageable site control so the team can make a solid decision on site.
If you need a method that combines practical field speed with a true image of the slab, Nova Digital Concrete X-Ray is built for exactly that.
Related pages and articles: